Configure Historic Database Connection
When setting up historic monitoring, Database Health Reports uses a database called DBHealthHistory on the SQL Server that you specify as the monitoring server. Step 1 is to establish a connection to the server that will hold the monitoring database. Step 2 is to tell the monitoring database which databases to monitor. Once those two steps are complete you then just wait for historic data to be collected.
Step 1: Create or connect to an existing monitoring instance.
When you have not yet configured any historic reporting, the database overview and server overview pages will show the following panel. This is an indication that there is reporting available that hasn’t yet been turned on.
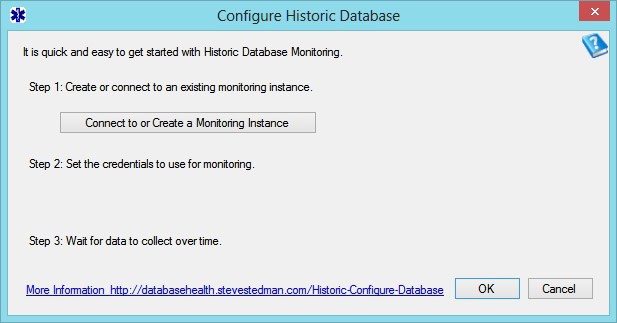
Click the “Click here to configure…. ” message and the following dialog will be shown to allow you to set up the historic monitoring instance.
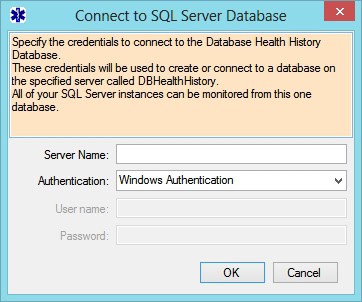
When you click the “Connect to or Create a Monitoring Instance” button you will be prompted for database connection credentials. These credentials can be either Windows Authentication or SQL Server authentication. This connection will be used to connect to the database instance and create a database called DBHealthHistory. This database will be used to track the historic data over time for your reports.
When setting up a monitoring instance it is best to use a SQL Server besides the one being monitored. This was the historic tracking data will have less of an impact on your production server. The historic monitoring database will not work with a SQL Express database because the SQL Agent is needed to do the monitoring, and there is no SQL Agent with SQL Express.
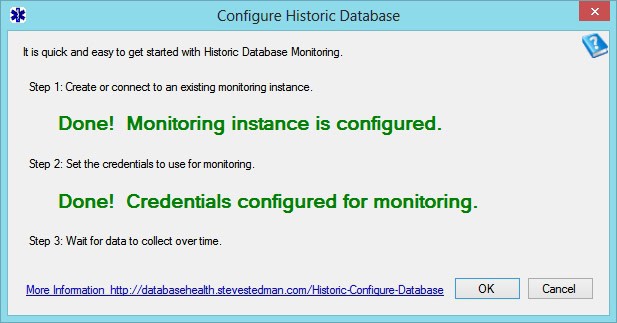
Once you have entered your credentials and the DBHealthHistory database has been created you will see the following message on the configure dialog stating that the “Monitoring instance is configured”.
At this point you are ready to specify which databases are going to be monitored.
Step 2: Set the credentials to use for monitoring.
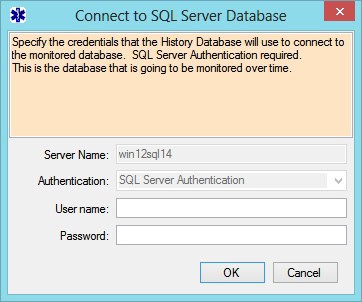
The second step is to set up the credentials that will be used to monitor any database. If you see the following dialog, you know you are ready to go on to step 2.
You will be prompted for credentials to use for monitoring. Here SQL Server authentication is the only supported option. Specify a SQL Server username and password that will be used when connecting from the monitoring server to the server that is being monitored.
After entering the SQL Server Authentication credentials you will see the “Credentials configured for monitoring” message. Click OK, monitoring will now begin.
Test Your Connection
Once the connection has been set up it usually takes about 4 to 5 minutes before the monitoring begins. You can use the “Test Connection button” to confirm that everything is in place to monitor from one SQL Server to another.
Wait for data to collect over time.
Depending on the load of your SQL Server you may see the following message for some time. For a busy SQL Server, you will usually see reporting data available within a couple hours of when the reporting was turned on. For a lighter load SQL Server it may take a couple days to a week to see any significant wait data.


Leave a Reply